What is dead end?
A dead end is when the water flow has been restricted as a result of, for example, a kink in the hose or the use of a hose/pole shut off valve.
What is the calibration used for?
The controller will pause the pump when it detects a dead end. Setting the calibration will determine how quickly after the dead end is created the controller pauses the pump.
What should the calibration value be set at?
It is different for every system. The V11 and V16 ranges (excluding the Analogue) both have built in auto calibration. To calibrate follow the steps below.
What happens if the calibration is not set correctly?
It is important to set the calibration correctly to avoid a pressure build up in the hose and subsequent damage to the pump. Setting the calibration correctly avoids use of the pressure switch to protect the pump.
Setting the calibration too high could also cause a splurge of water after the dead end (eg use of a pole tap) has been removed. This is because the pump has kept working after the dead end has been created, therefore adding pressure into the hose.
Setting the calibration too low could lead to the pump being shut down too early (false dead end). This can cause the water to 'spurt' as the pump is turned on and off quickly.
When should the calibration be done?
The calibration should be carried out after installation or whenever there has been a change in the system (eg change of pole, hose or pump). It should also be done when working at height, or if there is a significant weather change.
Properly calibrating the dead end will prolong the life of the pump, take strain off the system, and even use less water.
1. To auto calibrate, turn on the controller and make sure that the water is flowing.
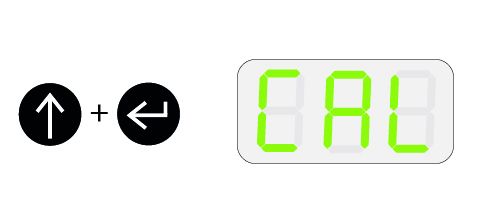
2. Press and hold the up and enter buttons, CAL will be displayed.
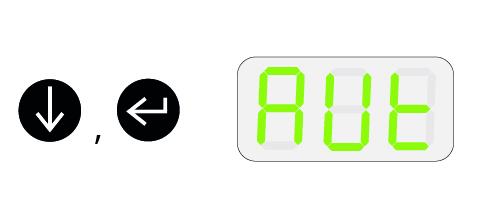
3. Press the down button until AUt is displayed, then press the enter button to start.
4. After several moments the calculated CAL value (e.g. C25) will be displayed.
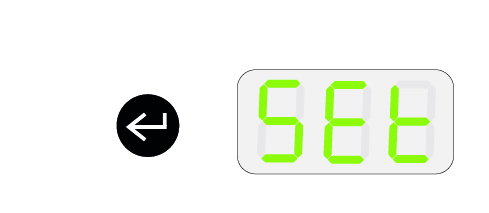
5. Press the enter button again to set the value. The controller is ready to use.
The CAL value can be adjusted manually before and after using the auto calibration by using the up and down buttons accordingly